Showing posts with label WIP. Show all posts

Thursday, August 6, 2015

Doll making

I had to let these little dolls sitting patiently while I got busy with other projects, but they keep me company and I love to see them sitting pretty by my desk on top of a paint jar, that's how tiny they are!.
So, one of them is patiently sitting, waiting for her hair :o)


I have some sweet news for the fall... can't wait to tell you! ♥♥♥

Friday, June 5, 2015

Tiny paperclay dolls

I am working on three little dolls, all of them under 3 inches tall:
Aren't they cute?


Friday, September 26, 2014

A link with beautiful doll faces

I love faces. Painting them and sculpting them.
This September I have been running a fun challenge called 29 faces, for everyone interested in perfecting their craft or practicing new things, we all in group fly together and share, cheer and enjoy hundreds and hundreds of faces.
Since I left in the back burner my sculpting, and I have this challenge going on, I have been feeling the "clay itch" again, so before I grab my tools I'd like to share this beautiful link full of doll faces in clay, in their site: (The photo is not mine)


 From a Oksana Muratava class in Moscow. HERE

Thursday, July 11, 2013

How to add arms

This is an easy and fun tutorial on how to add arms to a doll.
My model is a fabric doll made by JasmoonButerfly
The arms are paperclay, but they can be polymer as well, just make sure you make some little holes when you are sculpting them.
 You need:
-A doll and her limbs with a perforation
-Beads a bit larger than the holes in the limbs.
-Strong thread.
-Large needle.

We start by getting a strong thread or floss. In this case I am using gold acrylic floss, and tiny beads in a color coordinated blue.


Insert needle from the back, pull out from the shoulder area.

Pick up the bead and and push the needle through the doll into the other shoulder. Make sure they are even: 

Pick up the other bead, push thread back ion the hole, and insert in the shoulder towards the back again.
Make a good knot and add a bit of glue.


Here she is, all dolled-up.

Thanks for visiting, don't forget to "follow" this blog to be notified of ore tutorials and fun doll pictures!

Wednesday, May 22, 2013

Getting there....

These twins started by Tracey-anne, they are still in progress. Painted by Leandra, and the hair added by Xanthi. One was still missing limbs but not any more! I made a set of legs and arms for her. I only have one complain: The new paper clay Michaels carries is not my favorite. It is hard to work with, too gummy and sticky, ugh! not at all like Creative paperclay, so it was not so enjoyable to work with it.
Moon (the one in blue) is going to be a bit shorter than Sun (the blond)


I will be working on their little outfits with the fabric I posted a few days ago. It will be so much fun!!

Monday, May 20, 2013

Pointy hat

Foxy is happy with her pointy hat. It still needs some decorations but so far she is happy ans she adores her tutu! She is almost ready to fly to the UK next week!


What do you think?

Thursday, April 25, 2013

Wilma's doll and news

I painted her little face, and I will do a couple of more things for this little dolly:
To see how she started click HERE


And HERE are some news on how my Tiny Team's other dolls are doing.
I am still waiting for my other team, but I hope to get a doll before this one has to go, so I can take pictures together!

Friday, April 19, 2013

Tiny Team Traveling Doll update!

Oh I am so happy to report, my little doll arrived to Australia well and has been getting prettier. She has a name now: Dimi ♥
 

Wilma gave her an Australian look, I absolutely love the designs and colors! Look at Dimi sitting pretty on a clay pot by a garden: Her skirt is fantastic!


And guess who she met Down Under?? Lulu's doll was arriving to beautiful Australia right when my dolly was getting ready to go!
Hello dear friend!

Do you want to see more pictures? Visit Wilma'd blog HERE

Monday, April 8, 2013

Extra photos

While I wait for the next dolls to visit me, I will post these other photos of Lulu and Xanthi's dolls:
Something distracted my model and the photo-bomber hehehe:


And the little shoes I painted on Xanthi's doll:


Wednesday, April 3, 2013

Xanthi's doll new face

After a nice brake, Xanthi's doll finally had some work done, first with pencil....


and then paint added to her, and this is her new look, what do you think?

She was all happy, smelling the roses :o)


and a last close up:


Friday, March 29, 2013

Lulu's doll visiting me

Traveling in that box was extenuating! Lulu's dolly needed to relax a bit before starting any make overs! :o)


Oh, more comfortable on a chair, by the flowers...

The day was so warm, she was quite content to be by the shade in the garden:

And how nice it is to visit with friends (Xhanti's doll) while enjoying the afternoon!

Maybe now we will be ready to start thinking of colors, outfits and fun stuff... visit again to see the progress!

Tuesday, March 26, 2013

Two guests!

Wow, my 2 teams' dolls arrived at the same time! yaaay!
From Xhanti in Greece comes this sweet doll ready to have a face.

The dolly told me she wants to have green eyes :o)


Relaxing in the garden after such long trip:


She is thinking what clothes should she wear:

Visiting with Lulu's doll:

Check back again this blog for more pictures!

Saturday, March 23, 2013

Talking about photos

When I paint, I scan my art most of the time, or tape a direct and even picture of the canvas with nothing else in the image.
But when it comes to dolls, it is much better to find fun angles, props, good light, and almost like a painting, you have to find the right position in "thirds", meaning, divide in thirds with imaginary horizontal and vertical lines:


 ...And place your doll (or main object in the photo!) on the two thirds to left or right. For a composition, it is more pleasing to the eye and gives you more space to play with if you .
Just practice a lot, if you are like me that wants everything pictured right in the center :oD


And a different photo with props, and placing the doll on the third side, but I think there's too many things to distract the eye:


Cropping the image a little, makes the eye go to the doll easier:


Have fun practicing!

Wednesday, March 20, 2013

More photos!

For my traveling doll's mini team, I was thinking on how to add the hair, and how much to add to her....


I thought of giving her some tails but then I decided to just let it fall, and added tons of mohair! The above image is before I cured the clay torso.
I glued the mohair on the doll hair the same way I made the tutorial HERE

Linda is on her way to Australia now... we are starting Spring here, and She will be going to an end of summer weather, she will have fun!

Monday, March 18, 2013

Well, some news!

I had already sent my doll from my team, I was settling down for my other artsy activities when I learned some people had to cancel their traveling team and left 2 doll makers pretty much team-less, and I had been thinking already I would love to be part of 2 teams, like last time.... so I offered to be part of their mini team, and here I am! yaay!
My mini team's members are Lulu's apple in California and Wilma in Australia!

Since things were already rolling I went to my box of unfinished projects and I found the perfect beginning for a cute little doll. You probably have seen her in the eye tutorial.
She has been sitting pretty with only half a head of hair and no body. So, to begin with, she needed a way to attach the head to a body and polymer (or paper clay!) is the solution for crazy problems like this one.


I made this funky looking body part aka torso, out of polymer clay this morning. Making sure the size was right and there was a way for the head to sit safely on it and that it had a way to attach to a cloth body, so it has 2 little holes front and back.


I named her Linda. Keep checking for updates to see her progress!


Thursday, March 14, 2013

Here he goes! Traveling Art Doll 2013

This is my Gipsy Fairy Guy... he has no name yet! I will leave that to my next team member in the Traveling doll :oD
So far he is only a barely covered armature, a face with pointy ears and a 5 o'clock shadow.
He is starting his great adventure going to England, then moves to Spain for a while, then to Greece and when he comes back to California, he will be so transformed and different, with so many stories to tell me!
Hhhmmm I wish I could hide in the box with him as well and go places! lol


Thanks for visiting, and I hope you enjoy the ride along with my team of wonderful doll makers!

Sunday, February 3, 2013

Doll parts

November, December and January went on a blur...
I always feel that as long as I survive January I'm ok, because it is such a blah month for me. Cold, gray, and I don't feel like doing anything.
But here we are in February! I am actually running a painting challenge in my other blog, but I am planning to come and work on dolls in March. I certanly have many dolls waiting for me to be finished!


Do you also have doll parts waiting for you? Do you want to finish them? :o)


Tuesday, September 11, 2012

Sculpting a toddler face

Here's a good sculpting video of a toddler doll by Christy J. Click HERE to see it.

image from her video


I feel lucky every time I bump into a good tutorial or even WIPs
Comments? Ideas? Suggestions? Feel free to post

Thursday, October 13, 2011

Here's Octavio

This little boy is Octavio... or, well, these are the parts I am sending to make Octavio into a finished doll, as he travels to Idaho, Washington and California. Sherry will paint him and put him together


Blog menu and new baby

Hello there! I have been playing with the blog's look, and added links of the top menu, hoping that it is more organized this way. Let me know what you think.

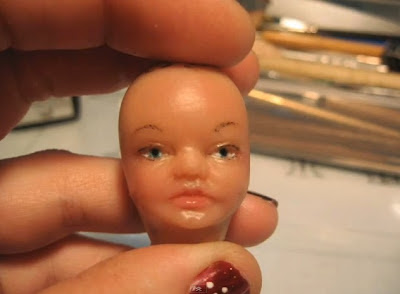
Also, I have been working on a new baby! He is not as chubby as I like them, but after not sculpting for a long while, I'm afraid my hands forgot how to do things! Plus well, I still have some trouble with my thumb I hurt about 2 months ago.
Never the less, here he is! Just from the oven, but not painted or anything, as he will go visiting on a tour to be painted, dressed etc... His eyes look better in person, this angle makes him look funkier than what he is LOL
I named him Octavio. (Because I made him in October :oP)